Hands-On Configuration
Introduction
In this section we’ll walk through the steps to configure health rules and widgets on a custom dashboard within AppDynamics so they pull their data from your specific TeaStore application instance.
You’ll use an existing health rules template and apply it to your own TeaStore application.
You will also customize the widgets in your AppDynamics custom dashboard listed below.
- Health widget for Business Transactions
- Application events widget for Critical Events
- IFrame widget for IWO Actions
Apply Health Rules Template
Use the credentials used previously to login to the AppDynamics controller if you’ve been logged out.
Navigate to the Health Rule template you’ll use for your TeaStore application using the steps below.
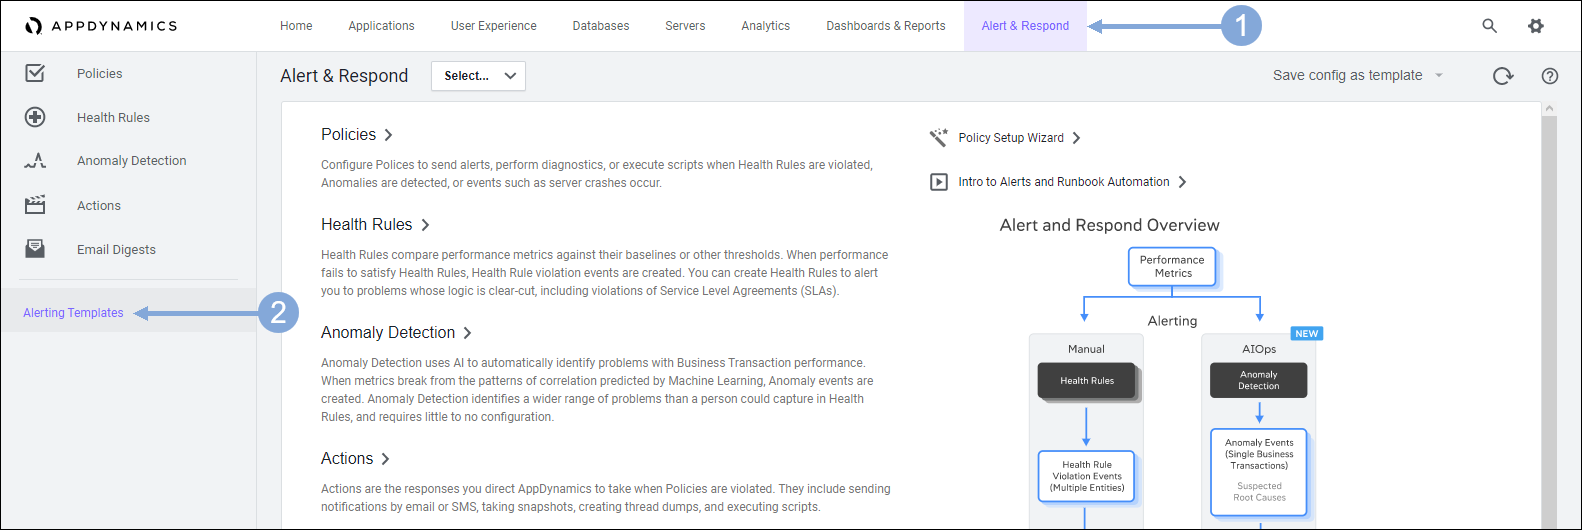
- Click on the Alert & Respond tab on the top menu
- Click on the Alerting Templates tab on the left menu
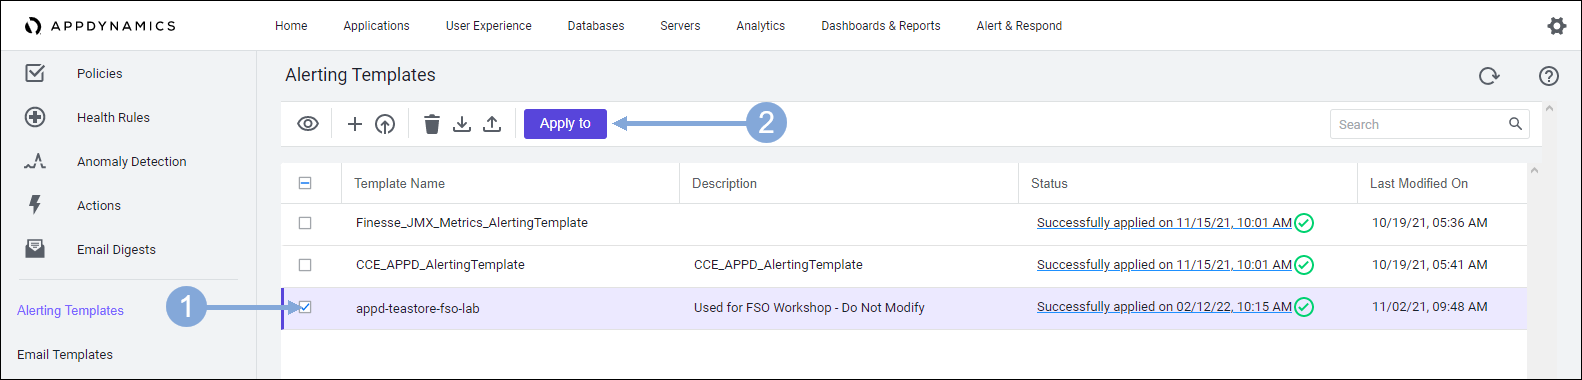
Select the Health Rule template to apply to your TeaStore application using the steps below.
- Find the template named appd-teastore-fso-lab then check the box to select the template
- Click on the Apply to button
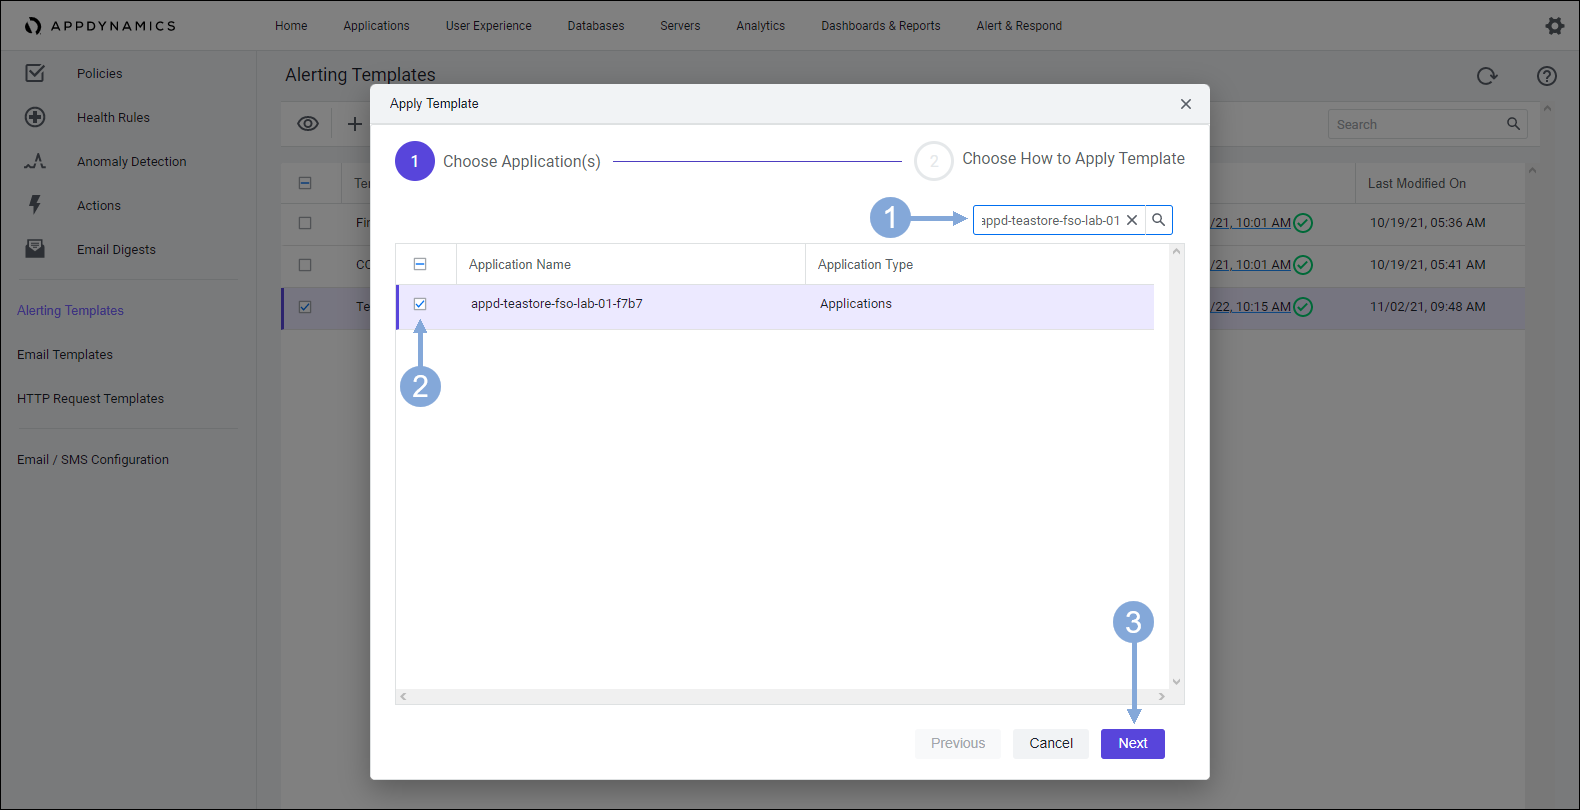
Select your TeaStore application using the steps below.
- Type in appd-teastore-fso-lab-{your-lab-number} into the search box to filter the list
- Check the check box for your TeaStore application
- Click on the Next button
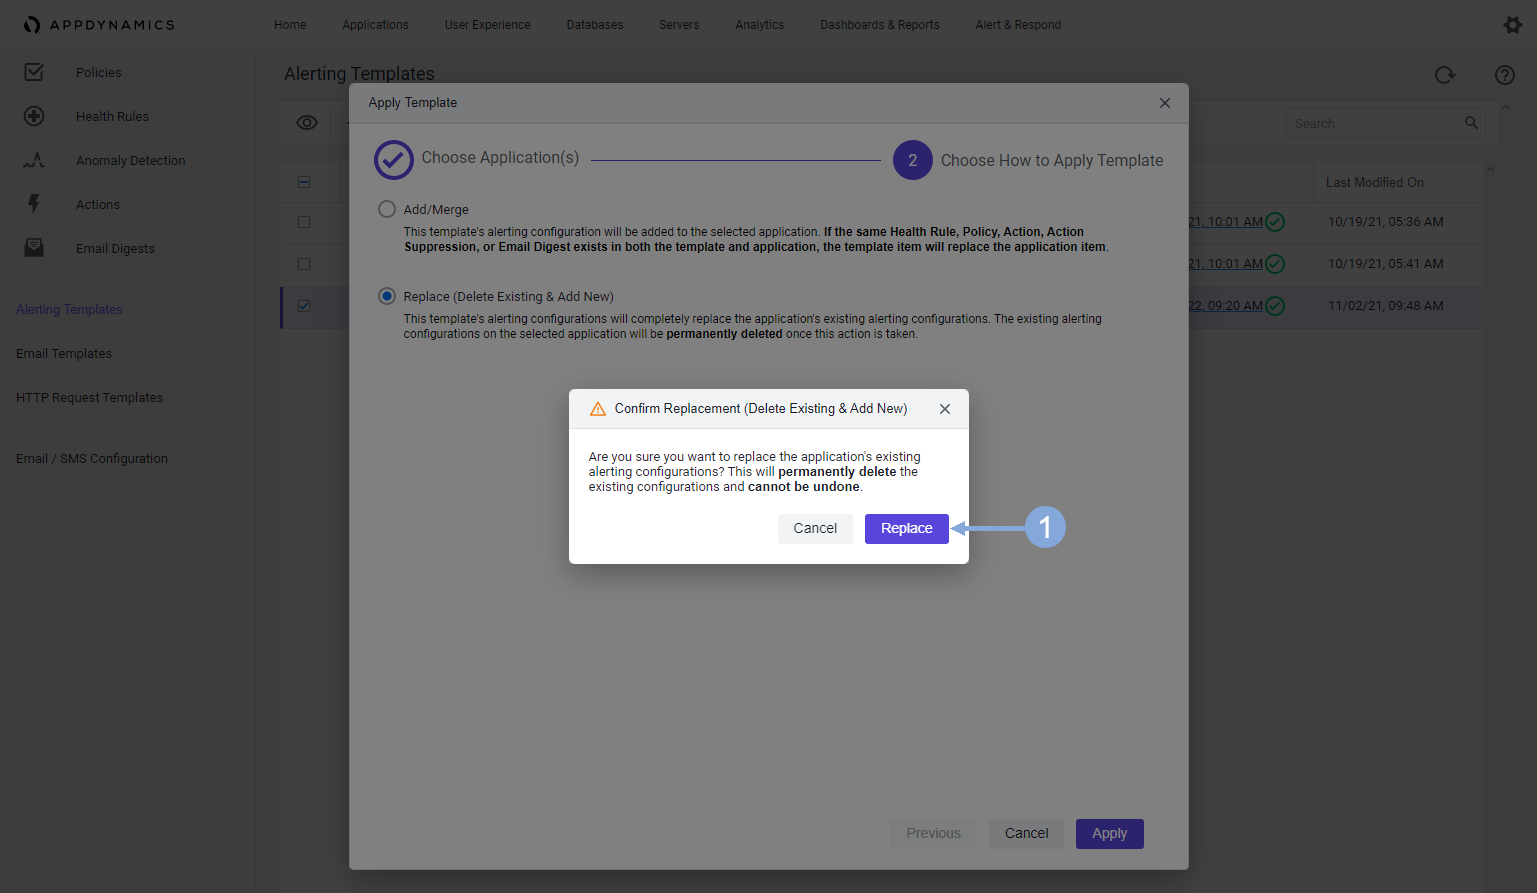
Use the steps below to finish applying the Health Rule template.
- Select the Replace (Delete Existing & Add New) option
- Click on the Apply button
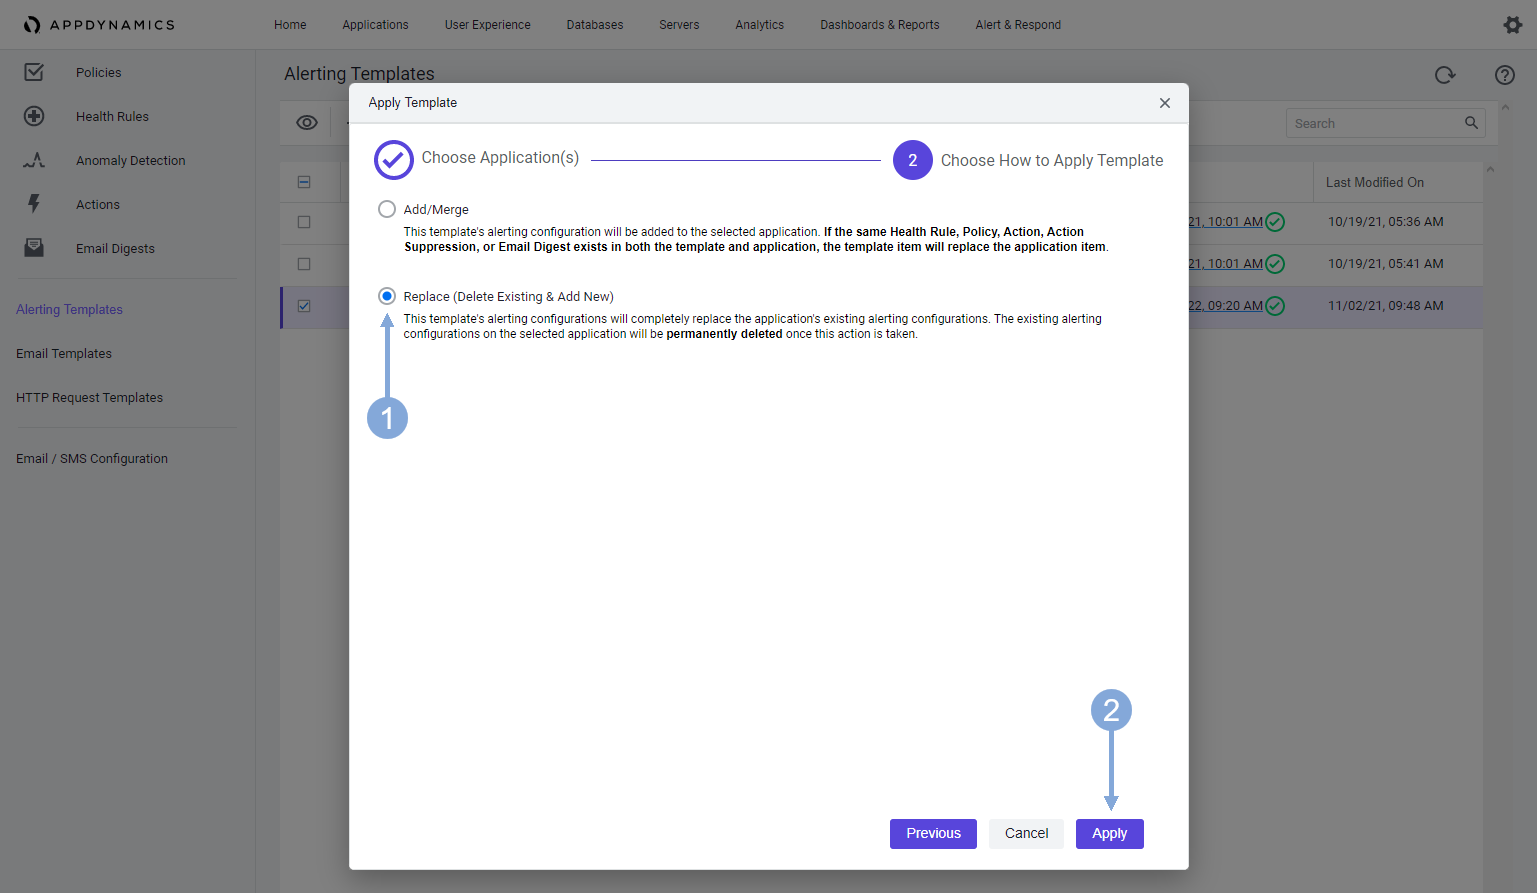
Click on the Replace button when the confirmation window appears.
Update BT Health Widget
Open your custom dashboard using the steps below.
- Click on the Dashboards & Reports tab on the top menu
- Double-click on the dashboard you see in the list (there should be only one)

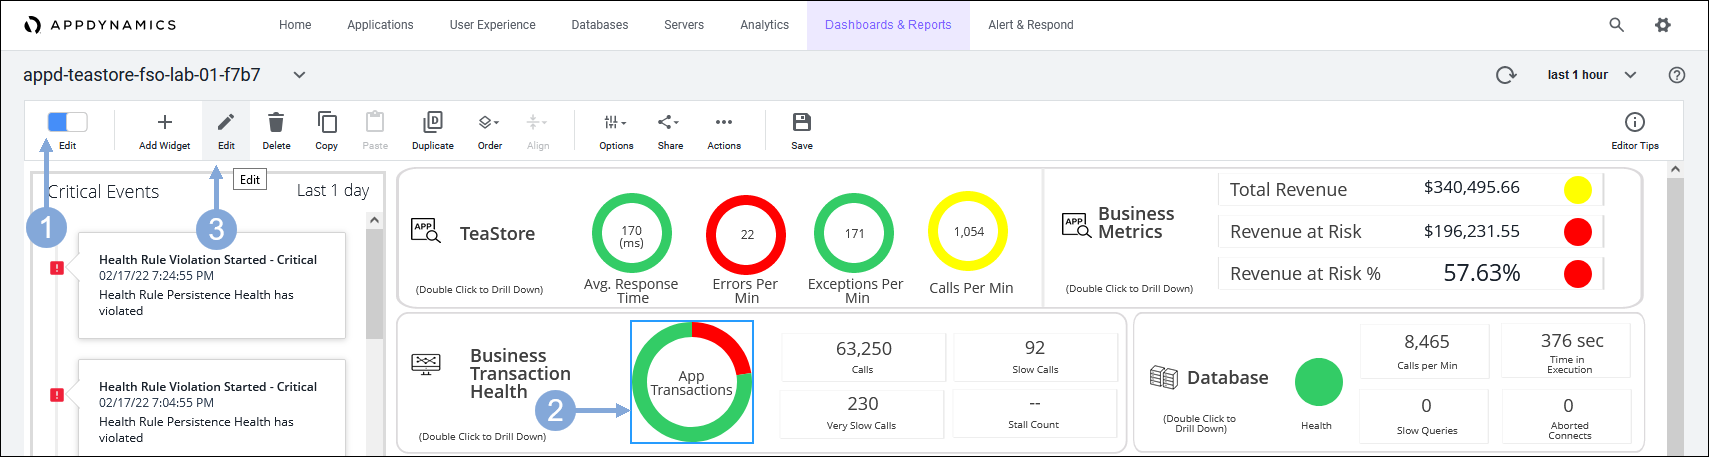
Update the Health Widget for Business Transactions on your custom dashboard to point to your TeaStore application using the steps below.
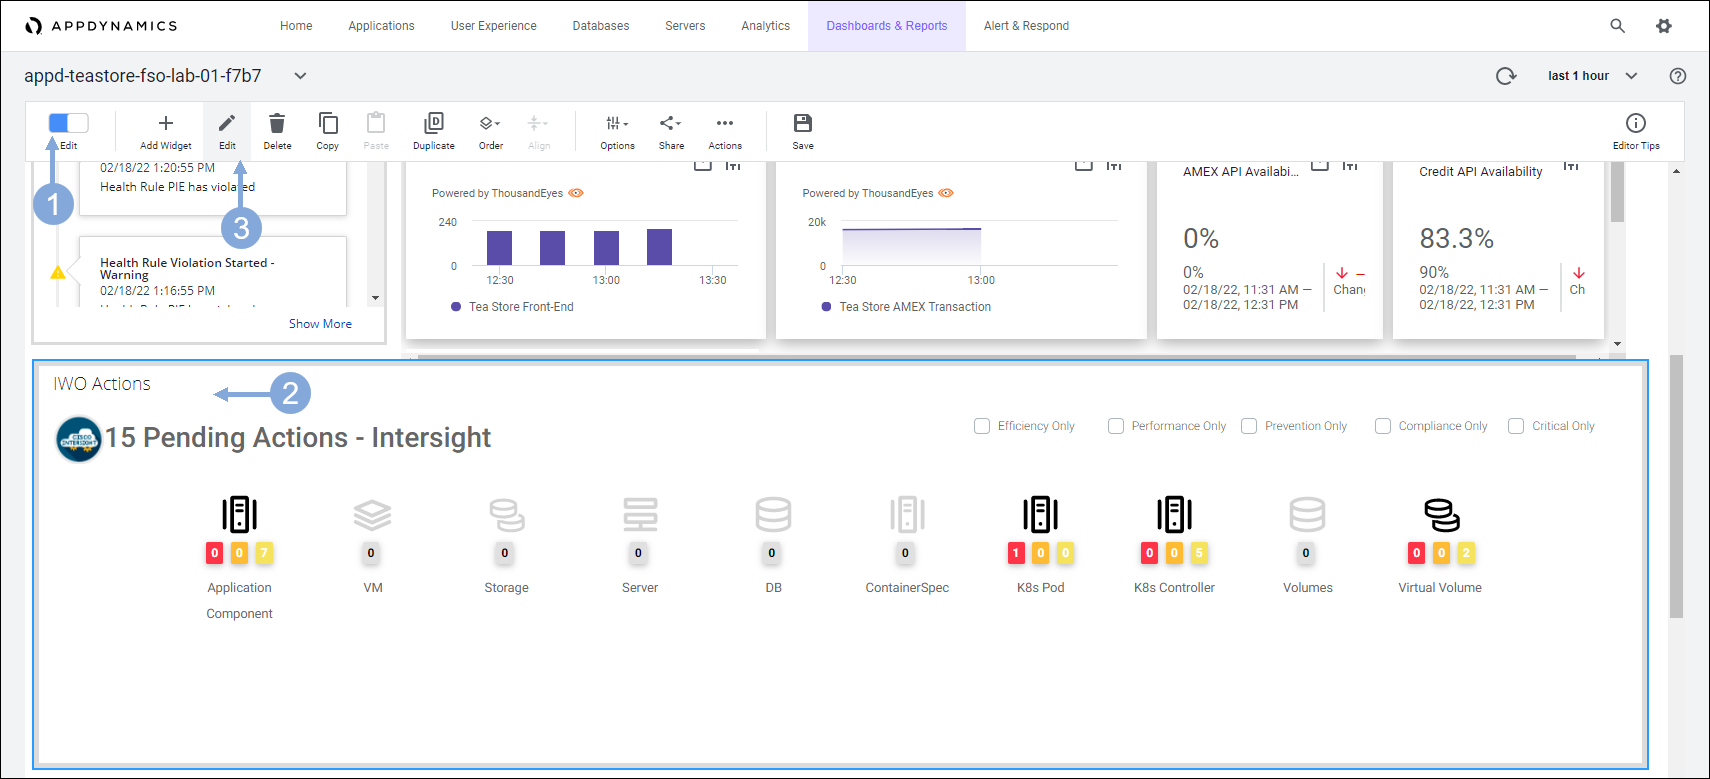
- Click on the Edit toggle button to switch to edit mode
- Click on the App Transactions circular health rule widget so that it is framed in blue
- Click on the Edit button with the pencil icon
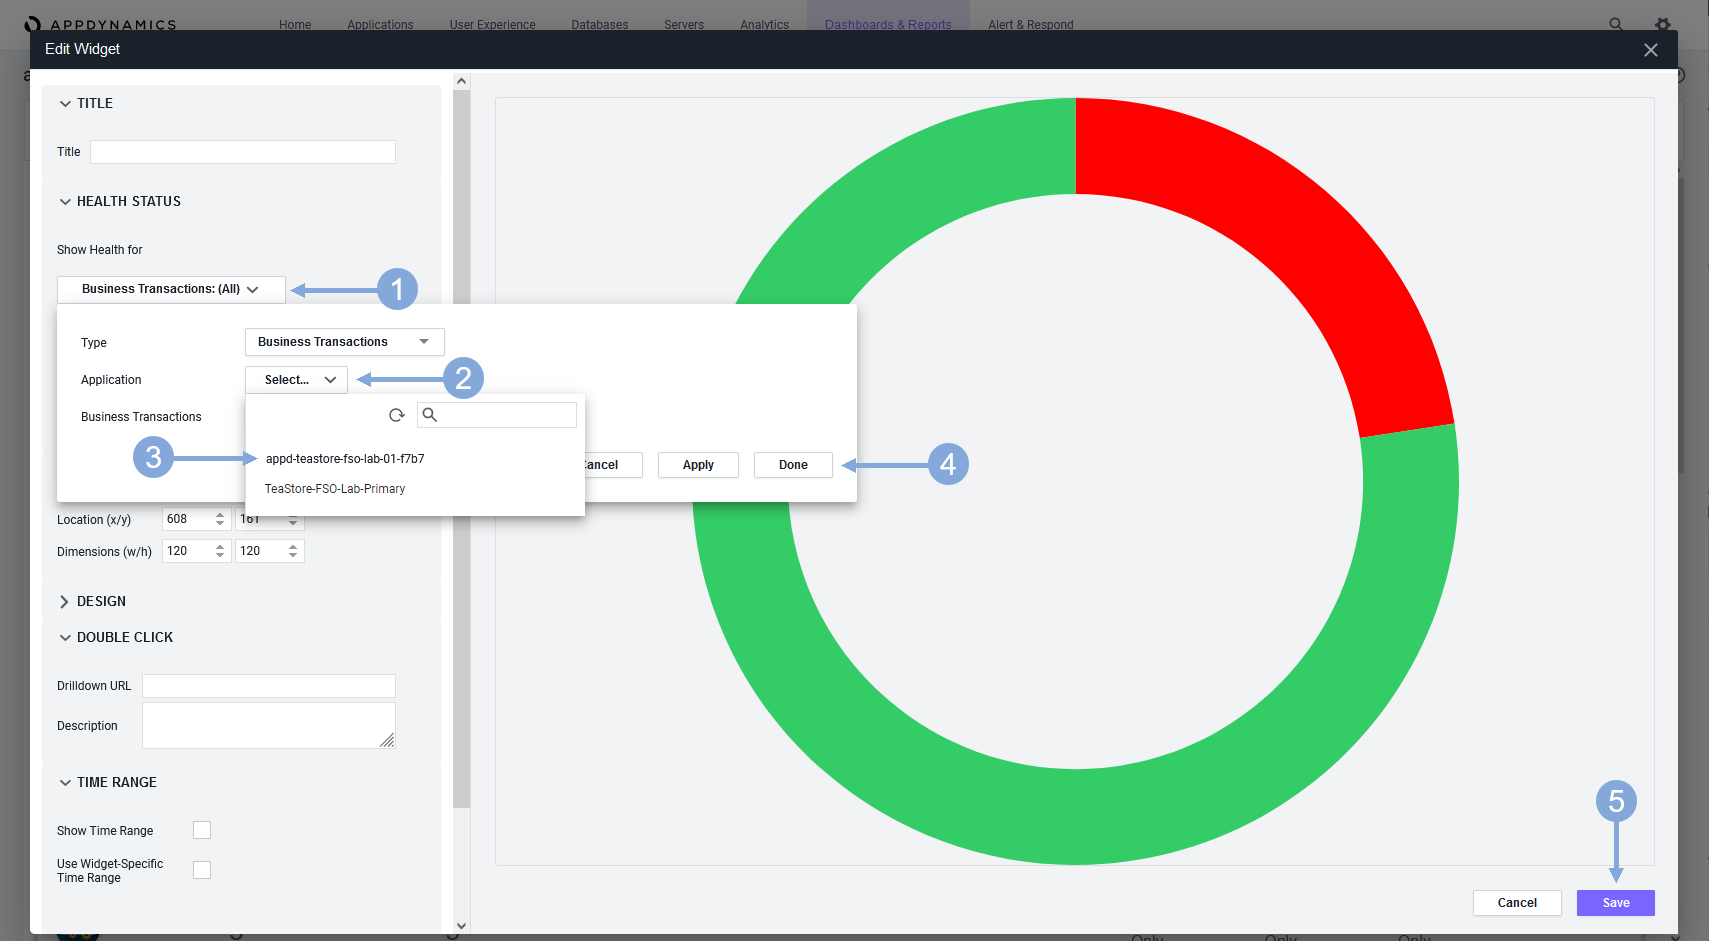
Use the steps below change the settings on the widget to point to your TeaStore application.
- Click on the Business Transactions drop-down
- Click on the Select drop-down for Application
- Select the TeaStore application named with your lab number
- Click on the Done button
- Click on the Save button
Update Critical Events Widget
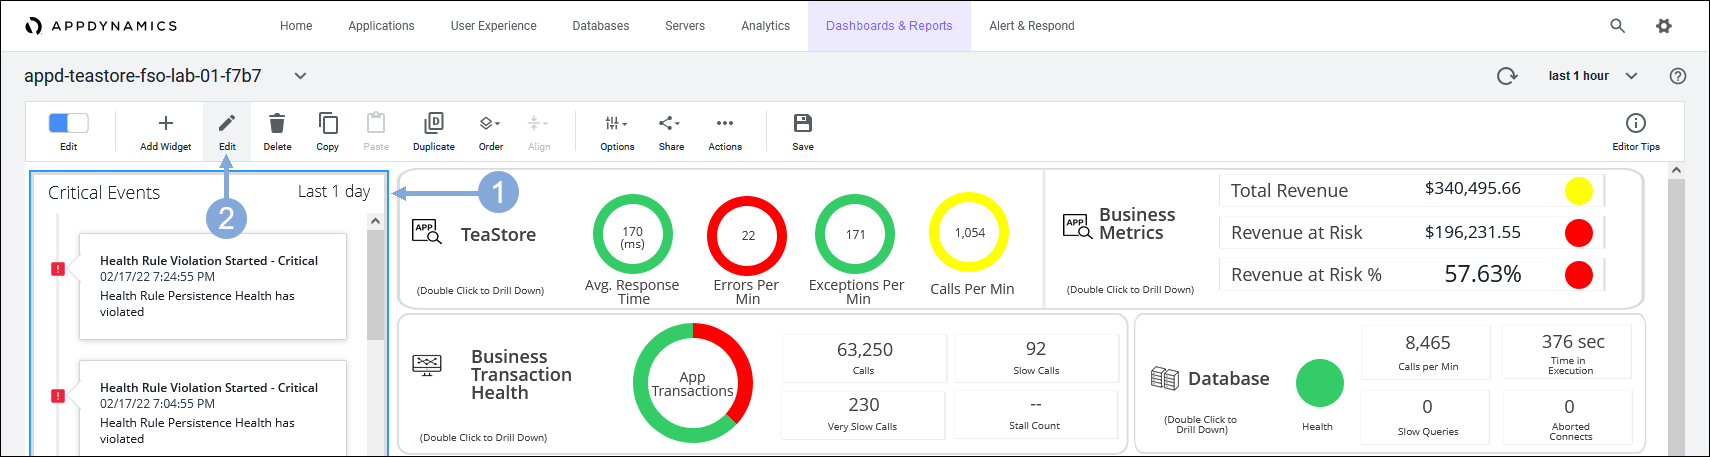
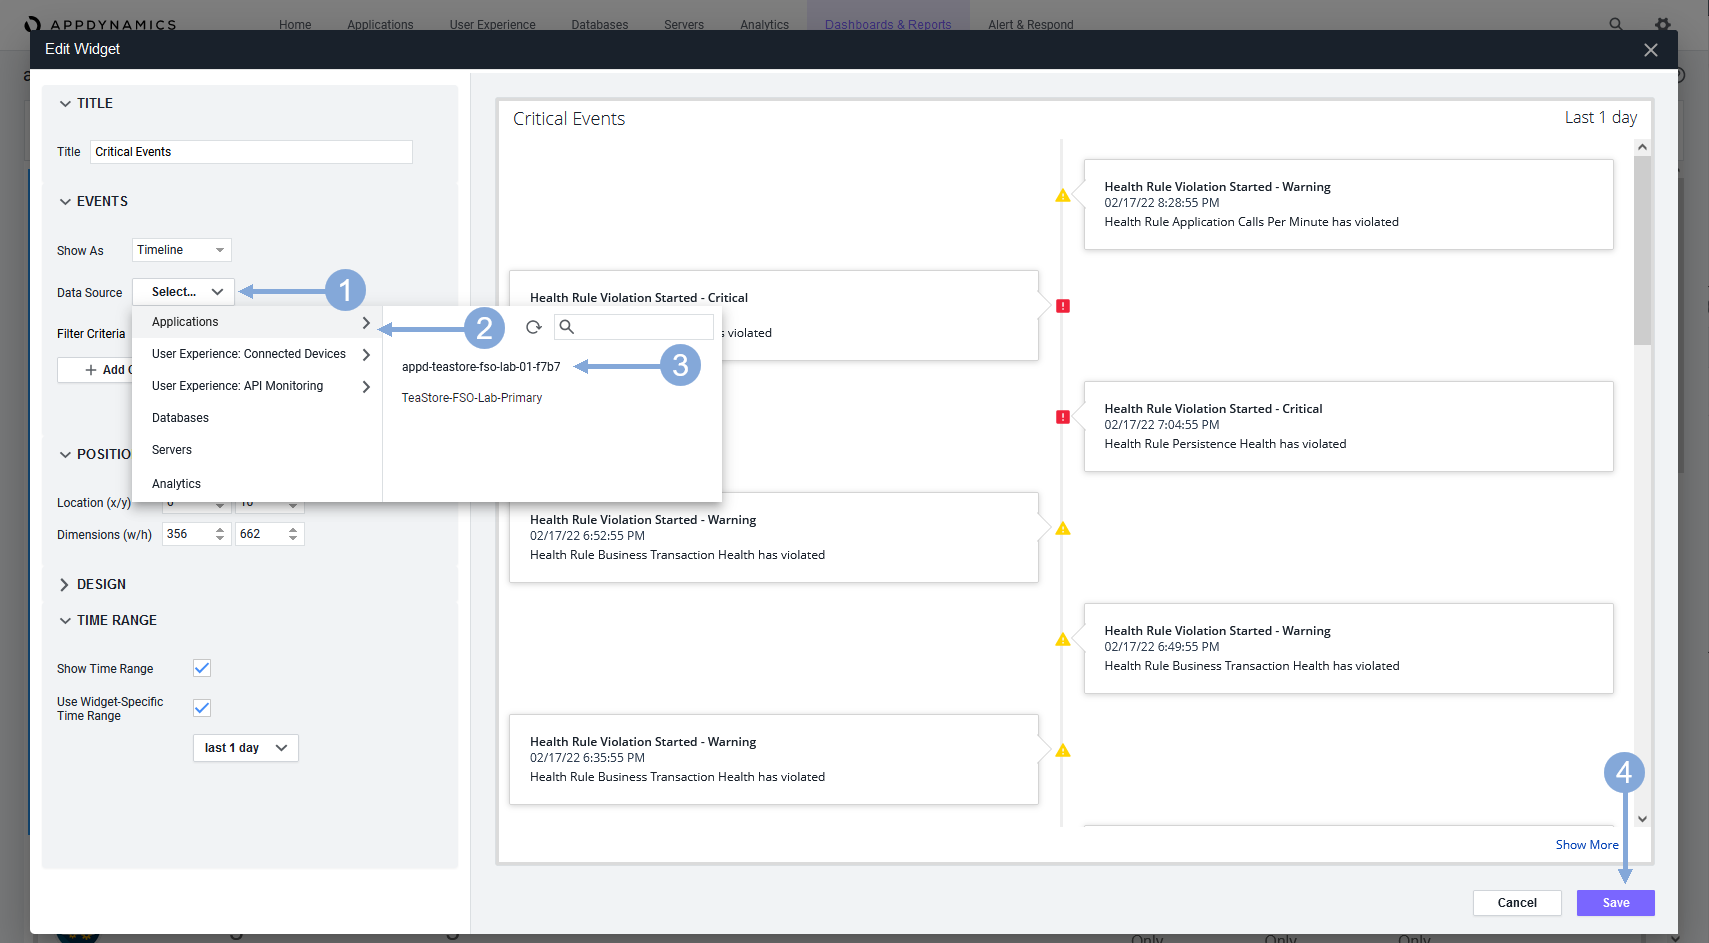
Update the Events Widget for Critical Events on your custom dashboard to point to your TeaStore application using the steps below.
- Click on the Critical Events widget so that it is framed in blue
- Click on the Edit button with the pencil icon
Use the steps below change the settings on the widget to point to your TeaStore application.
- Click on the Data Source drop-down
- Click on the Applications item in the list
- Select the TeaStore application named with your lab number
- Click on the Save button
Now click on the ‘Save’ button to save your changes to the dashboard.

Initialize IWO Action Integration
The IWO Action Integration is a simple NodeJS application that is meant to show the art of the possible by adding the pending recommended actions from IWO into your AppDynamics dashboard to provide a more holistic view of the state of your application.
Two prerequisites have already been done for you but are documented below.
You do not need to do these steps in the lab, they are for reference only.
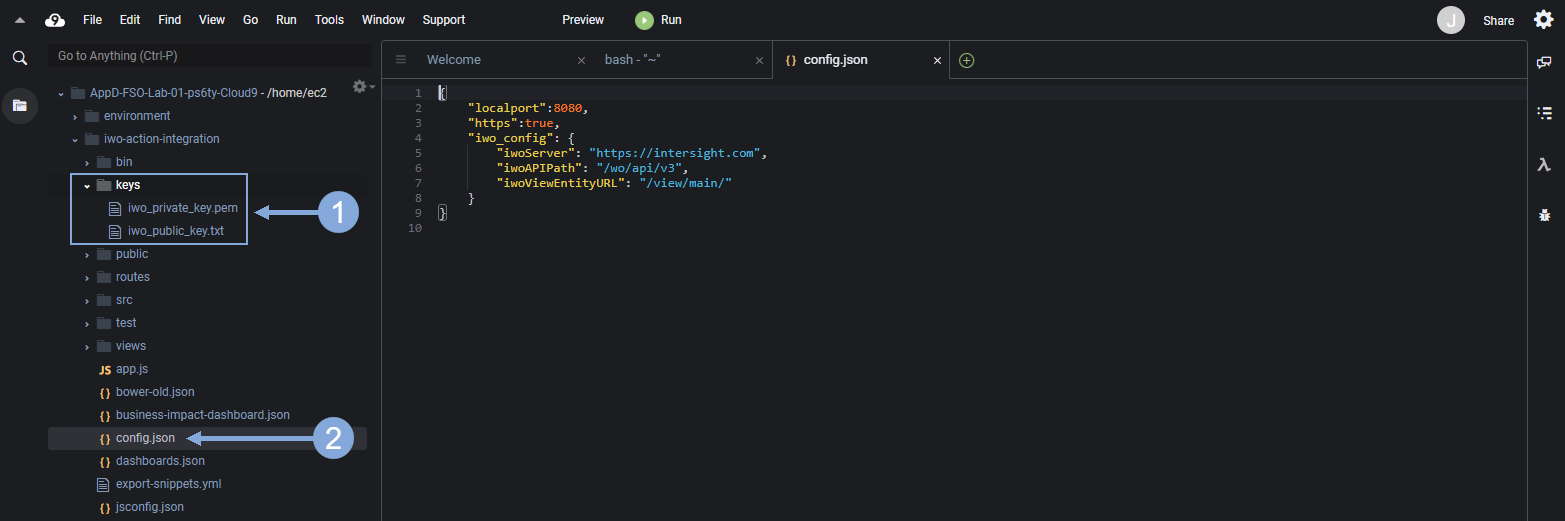
- The two key files have been created in the keys directory
- You can read how to create a new API key for OpenAPI schema version 2 in Intersight here
- The value for the API Key ID should go in the iwo_public_key.txt file in the keys directory
- The value for the Secret Key should go in the iwo_private_key.pem file in the keys directory
- The config.json file has been created for you and configured to listen on port 8080
- The other values in the config.json file would remain unchanged
You can find the instructions for these prerequisites in the GitHub repository for the IWO Action Integration.
Let’s proceed to the next steps you’ll need to perform. Open a new terminal window in your Cloud9 IDE
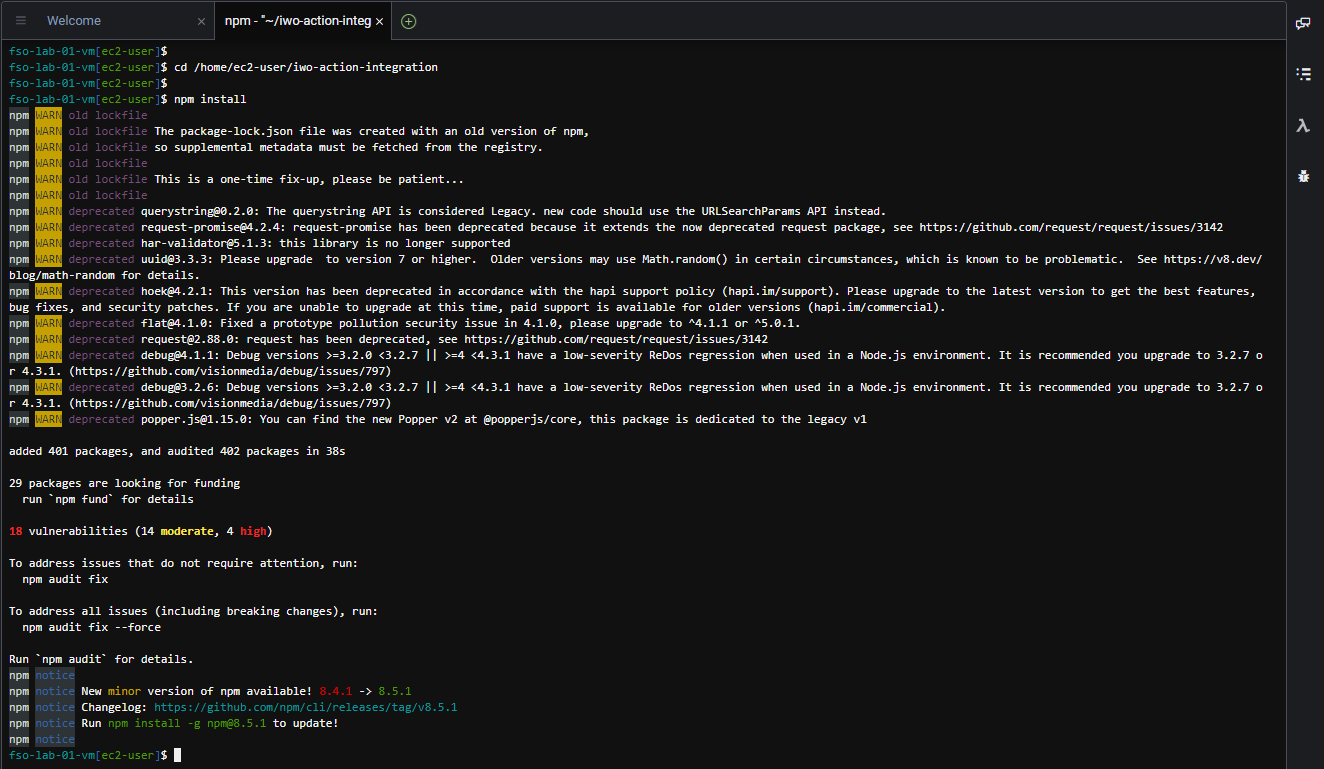
Update the dependencies for the IWO Action Integration application using the commands below.
cd /home/ec2-user/iwo-action-integration

npm install
The output should look like the image below.
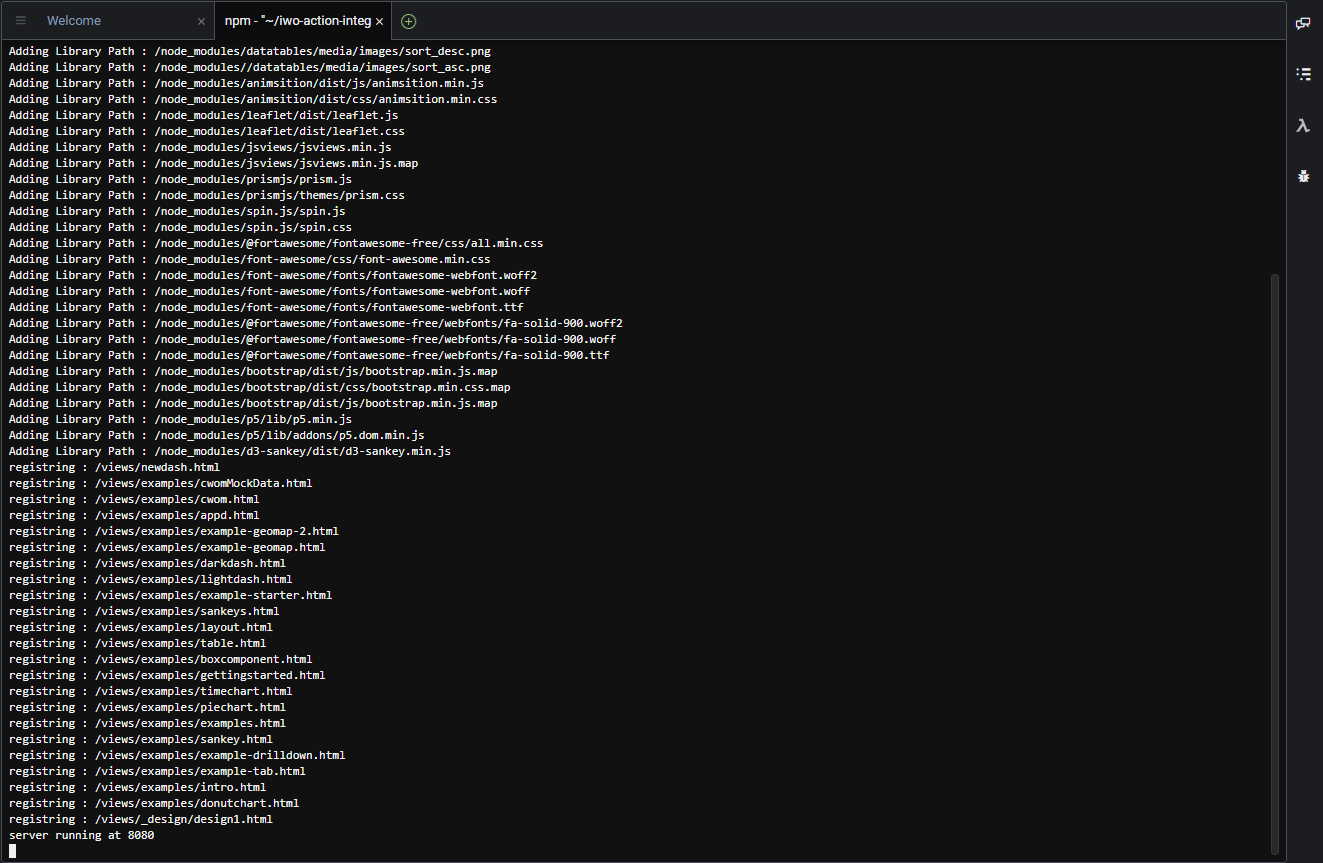
Start the IWO Action Integration application using the commands below in the same Cloud9 terminal used in the last step.
cd /home/ec2-user/iwo-action-integration

npm start
The output should look like the image below. Leave the appplication running in the terminal window. If it stops for any reason simply restart it using the same commands above.
Obtain URL for IWO Action Integration
Use the steps below to obtain the URL for the IWO Action Integration application.
- Click on Preview menu at the top of your Cloud9 IDE
- Select the Preview Running Application from the drop-down
- Copy the URL for the application and save it for the next steps
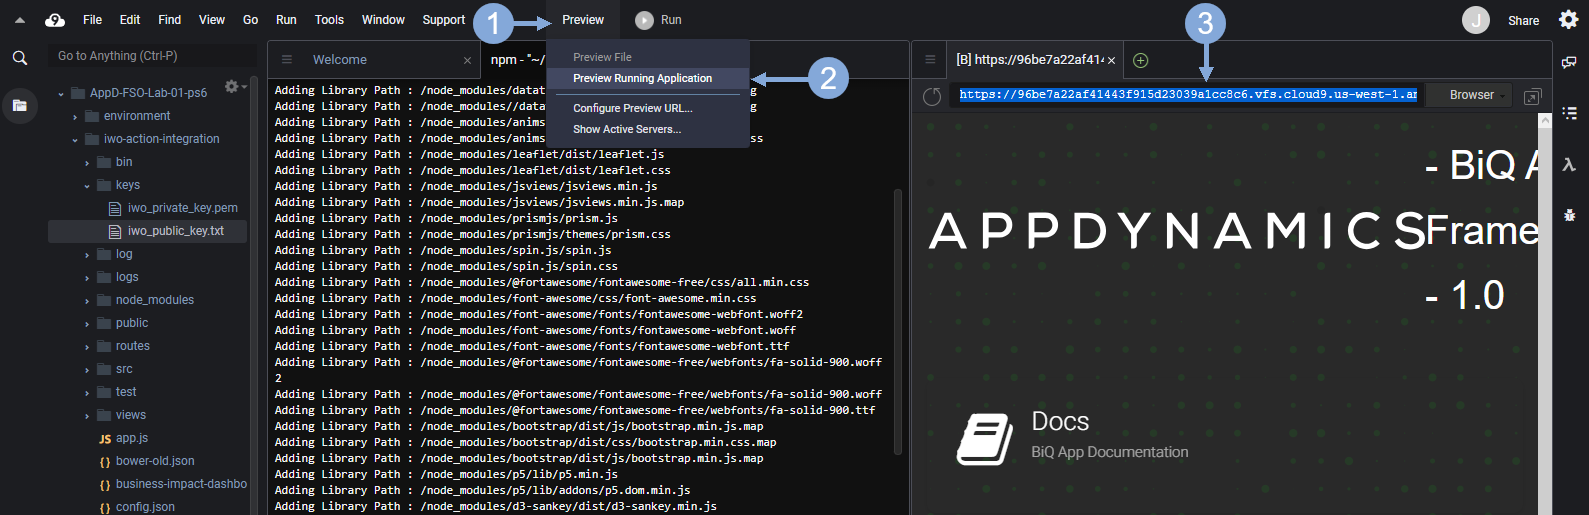
The copied URL should look similar to the one seen below.
https://96be7a22af41443f915d23039a1cc8c6.vfs.cloud9.us-west-1.amazonaws.com/Use the credentials for Cisco Intersight provided by your instructor to login to Intersight if you’ve been logged out.
Use the steps below to obtain the Business App Id for your application in IWO.
- Click on the drop-down menu on the left at the top
- Select ‘Workload Optimizer’ from the drop-down menu
- Find the Business Application that has your lab number in the name and click on its name to open it
- If needed click the ‘Show All’ link to find and open your Business Application
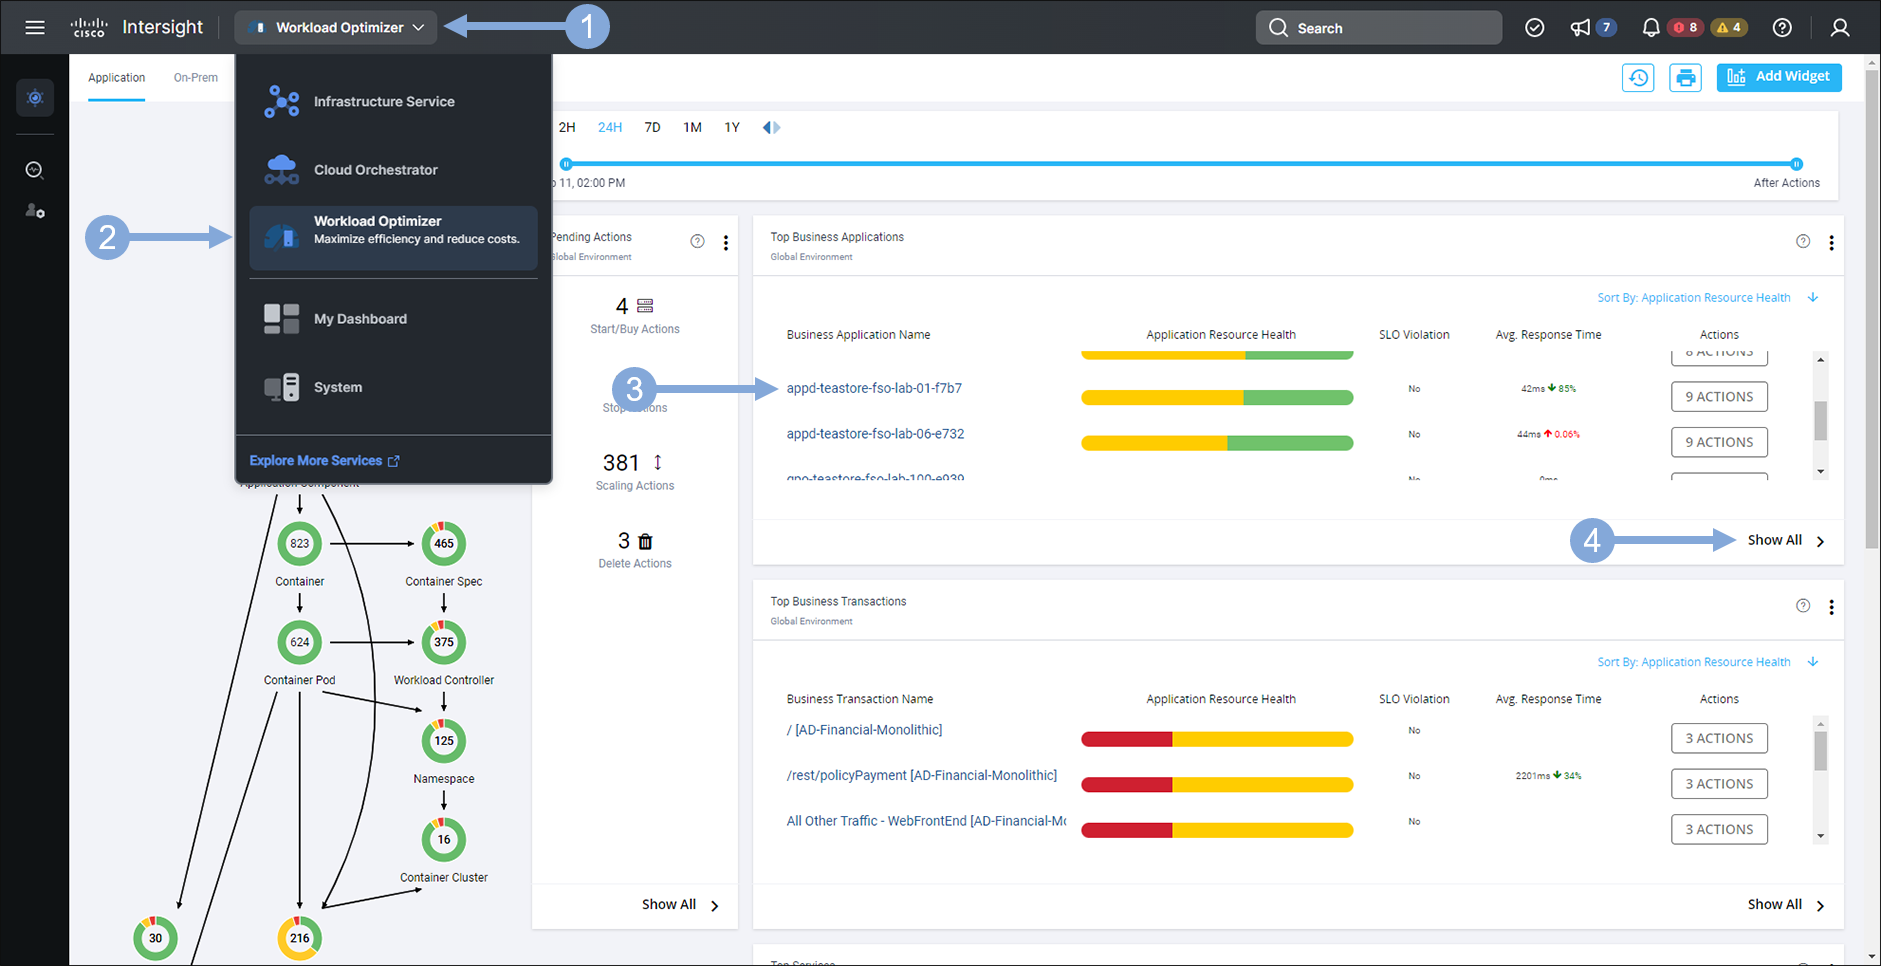
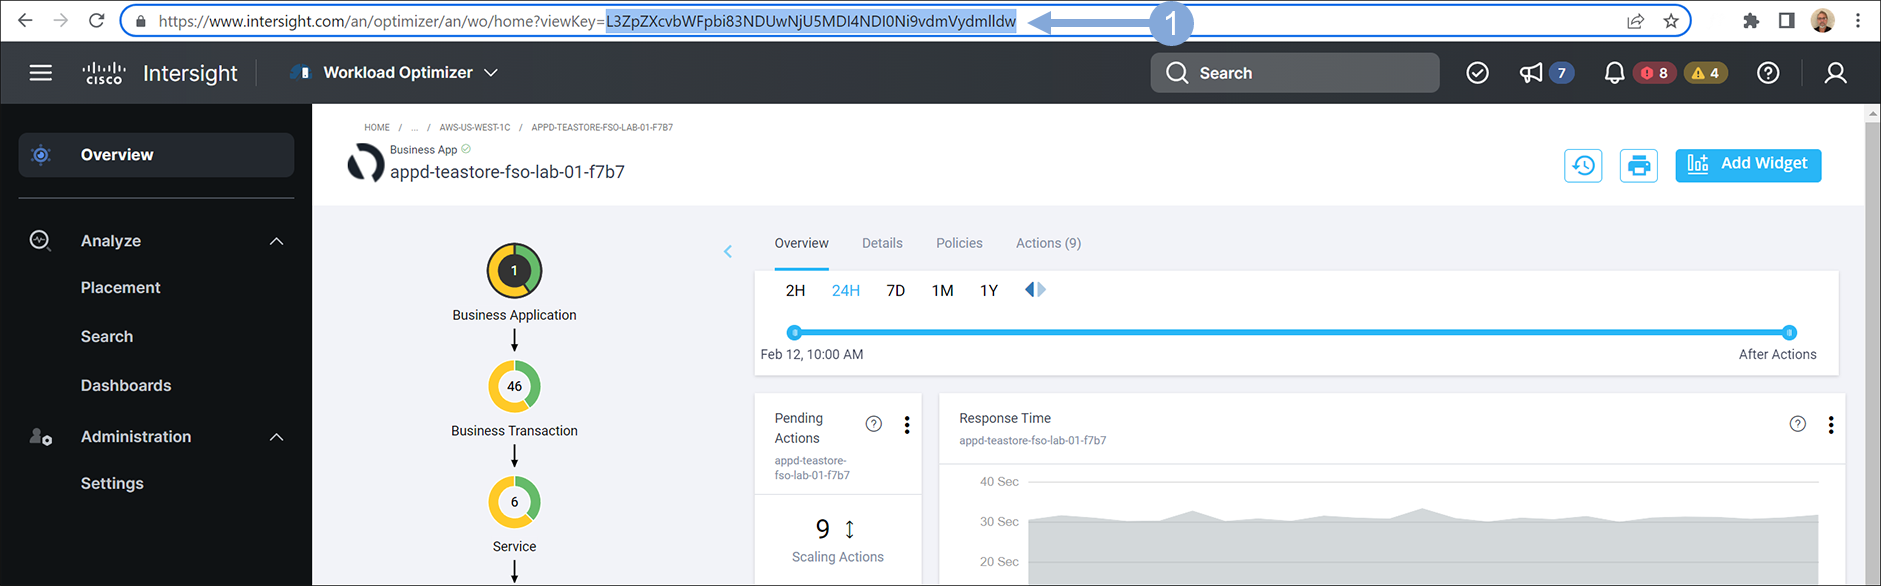
Once you’ve opened your business application, copy the value for the viewKey parameter in the URL.
Copy only the characters to the right after viewKey= and save the value for the next step.
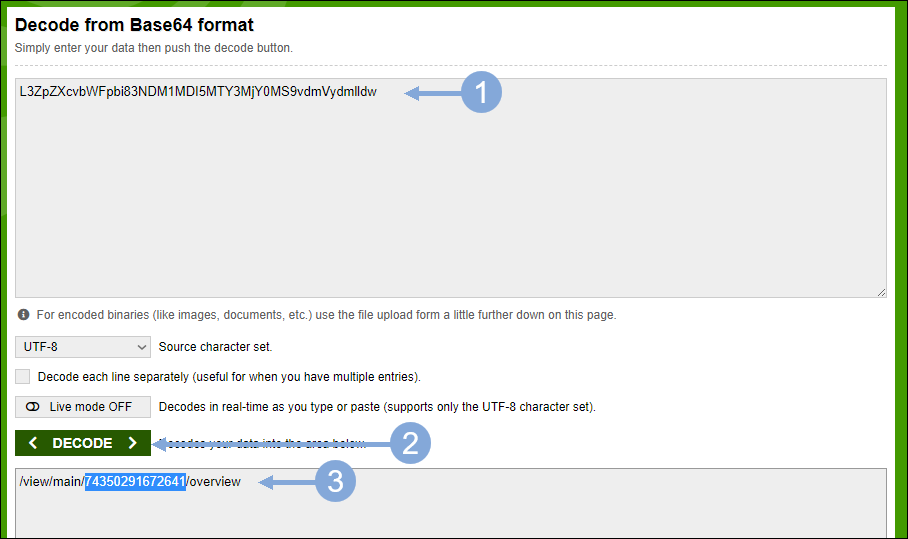
Open a new tab in your browser and go to the URL seen below.
https://www.base64decode.orgUse the steps below to decode your Business App Id.
- Paste the value for the viewKey parameter you saved from your prior step
- Click on the Decode button
- Copy the decoded value and save the value for the next step (copy only the numeric characters)
Now use the steps below to construct the final URL you will use in the next exercise.
- Start with the URL for the IWO Action Integration application you obtain in a previous step
- Add the following to right of that URL
- views/examples/cwom.html?businessAppID=
- Add the numeric decoded value of the business application id at the end
{IWO Action Integration URL}views/examples/cwom.html?businessAppID={Decoded Business App ID}
Your completed URL should look similar to the example seen below.
https://96be7a22af41443f915d23039a1cc8c6.vfs.cloud9.us-west-1.amazonaws.com/views/examples/cwom.html?businessAppID=74350291672641Update IFrame Widget for IWO
Ensure you are using the same browser window where you have your Cloud9 IDE opened in when you open a new browser tab for the next step.
Open your custom dashboard in the AppDynamics controller using the first steps you used in the Update BT Widget exercise.
Update the IFrame Widget for IWO Actions on your custom dashboard to point to the IWO Action Integration application URL using the steps below.
- Click on the Edit toggle button to switch to edit mode
- Click on the IWO Actions iFrame widget so that it is framed in blue
- Click on the Edit button with the pencil icon
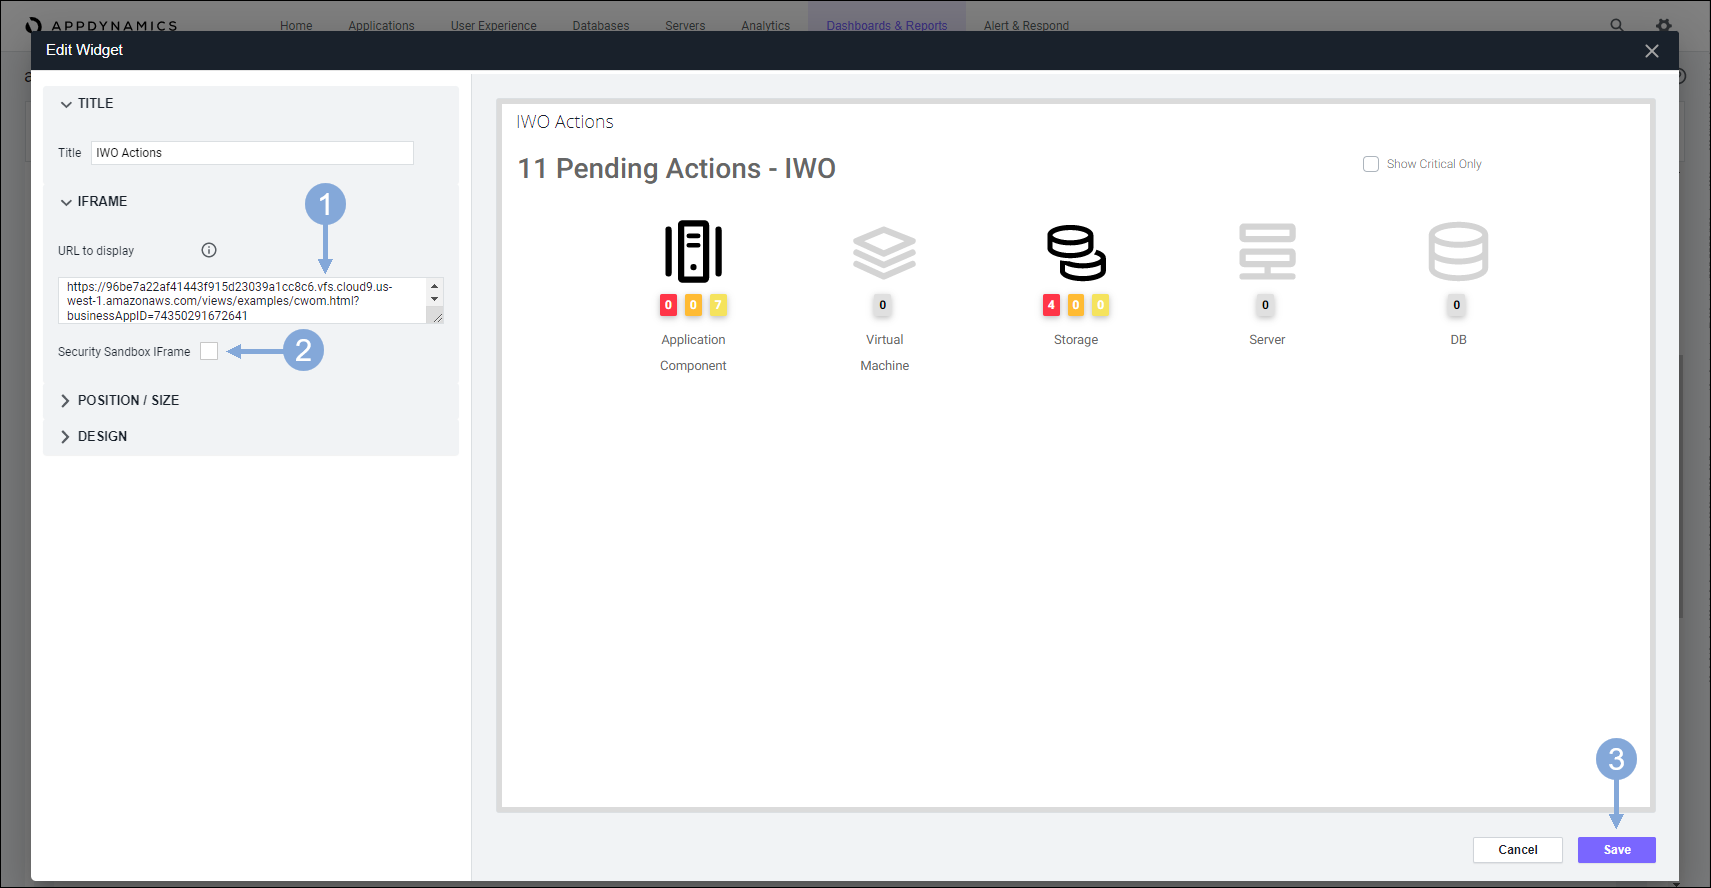
Use the steps below to update the IFrame Widget URL.
- Paste the URL you constructed in the previous exercise in the URL to display field
- Ensure the Security Sandbox iFrame checkbox is unchecked
- Click on the Save button
Now click on the Save button to save your changes to the dashboard.
Next
We’ll look at the results of your configuration with specific observability scenarios.